

If you are here by searching Best Freelance Presentation Designer , then you are in the right place , it’s a hard job to find or Select the best person or expert for your work, also powerpoint is a very complicated program , so make sure your programmer also has the best and Latest information about the program ,if he has that then you can go further with him. Before you contact Top Freelance Presentation design experts for Hire you should also Know the basic of it otherwise you will end up hiring the wrong person. In this post I will show you a basic of powerpoint program.
There is a lot going on with the PowerPoint program screen, so this lesson will help you become more familiar with it.
Understand The PowerPoint Screen before contact Best Freelance Presentation Designer :

| A | Title Bar: Displays the name of the current file.
The Title bar is located at the top in the center of the PowerPoint window. The Title bar displays the name of the presentation on which you are currently working. By default, PowerPoint names presentations sequentially, starting with Presentation1. When you save your file, you can change the name of your presentation. |
C | Display Options: Here you can change how much of the ribbon is displayed, minimize, maximize or restore the screen, or close PowerPoint altogether. |
| B | Quick Access Toolbar: This is a fast way to access some of the most used features.
Next to the Microsoft Office button is the Quick Access toolbar. The Quick Access toolbar provides you with access to commands you frequently use. By default, Save, Undo, and Redo appear on the Quick Access toolbar. You use Save to save your file, Undo to rollback an action you have taken, and Redo to reapply an action you have rolled back. |
D | Ribbon: This is where you’ll find all the options you need to create a presentation. The options are grouped into tabs.
You use commands to tell PowerPoint what to do. In PowerPoint 2007, you use the Ribbon to issue commands. The Ribbon is located near the top of the PowerPoint window, below the Quick Access toolbar. At the top of the Ribbon are several tabs; clicking a tab displays several related command groups. Within each group are related command buttons. You click buttons to issue commands or to access menus and dialog boxes. You may also find a dialog box launcher in the bottom-right corner of a group. When you click the dialog box launcher, a dialog box makes additional commands available. |
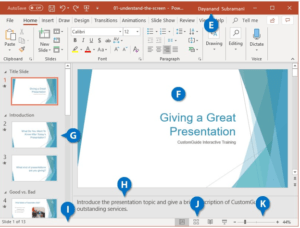
| E | Microsoft Account User Info: Shows current user information. Click to view account options. | I | Status Bar: Displays information about the presentation, such as slide numbers and buttons to view notes or comments.
PowerPoint Online may be only a web app that runs in your browser, but that hasn’t stopped Microsoft from making it so full-featured that it includes almost all interface elements typically found in desktop programs, including a Status bar! Let us explore both the Status Bar as a whole and individual options within this Status Bar. |
| F | Slide Pane: Shows a large view of the selected slide. This is where edits are made and objects are selected.
A slide pane is a feature available in some programs, usually found on the left side of the window. It displays thumbnails of files or features available in the program. For example, the slide pane in Microsoft PowerPoint presentations displays all of the slides in a presentation. This menu allows the user can click each of the slides to view and edit them individually. |
J | View Shortcuts: Quickly switches between the available View options. |
| G | Thumbnails Pane: Shows thumbnails of all the slides, numbered in the order they’ll appear. | K | Zoom Slider: Zooms in or out of a slide by simply clicking and dragging. Or use the + or – buttons to zoom. |
| H | Notes Pane: Holds notes for the presenter to read while presenting. |
Some of the Basic tasks for creating a PowerPoint presentation or looking for Best Freelance Presentation Designer :
Choose a theme
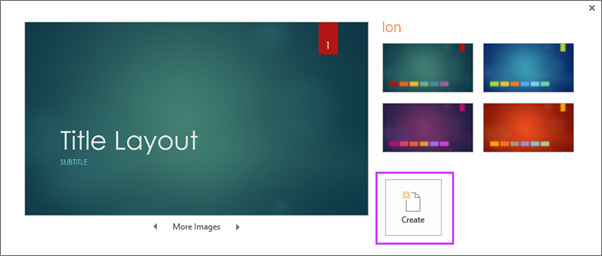
When you open PowerPoint, you’ll see some built-in themes and templates. A theme is a slide design that contains matching colors, fonts, and special effects like shadows, reflections, and more.
- On the File tab of the Ribbon, select New, and then choose a theme.PowerPoint shows you a preview of the theme, with four color variations to choose from on the right side.
- Click Create, or pick a color variation and then click Create.
Read more: Use or create themes in PowerPoint
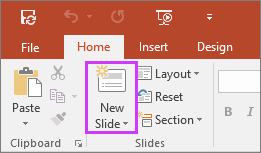
Insert a new slide
- On the Home tab, click the bottom half of New Slide, and pick a slide layout.
Read more: Add, rearrange, and delete slides.
Save your presentation
- On the File tab, choose Save.
- Pick or browse to a folder.
- In the File name box, type a name for your presentation, and then choose Save.
Note: If you frequently save files to a certain folder, you can ‘pin’ the path so that it is always available (as shown below).

Tip: Save your work as you go. Press Ctrl+S often or save the file to OneDrive and let AutoSave take care of it for you.
Read more: Save your presentation file
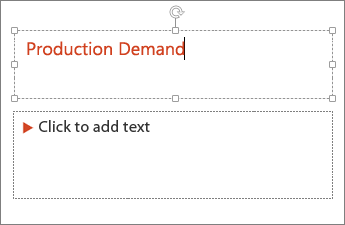
Add text
Select a text placeholder, and begin typing.
Format your text
- Select the text.
- Under Drawing Tools, choose Format.

- Do one of the following:
- To change the color of your text, choose Text Fill, and then choose a color.
- To change the outline color of your text, choose Text Outline, and then choose a color.
- To apply a shadow, reflection, glow, bevel, 3-D rotation, a transform, choose Text Effects, and then choose the effect you want.
Read more:
Add pictures
On the Insert tab, do one of the following:
- To insert a picture that is saved on your local drive or an internal server, choose Pictures, browse for the picture, and then choose Insert.
- To insert a picture from the web, choose Online Pictures, and use the search box to find a picture.
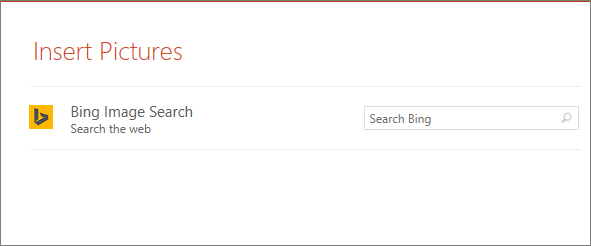 Choose a picture, and then click Insert.
Add shapes
You can add shapes to illustrate your slide.
- On the Insert tab, select Shapes, and then select a shape from the menu that appears.
- In the slide area, click and drag to draw the shape.
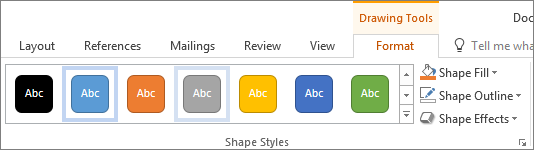
- Select the Format or Shape Format tab on the ribbon. Open the Shape Styles gallery to quickly add a color and style (including shading) to the selected shape.
Add speaker notes
Slides are best when you don’t cram in too much information. You can put helpful facts and notes in the speaker notes, and refer to them as you present.
- To open the notes pane, at the bottom of the window, click Notes
 .
. - Click inside the Notes pane below the slide, and begin typing your notes.

Read more:
Give your presentation
On the Slide Show tab, do one of the following:
- To start the presentation at the first slide, in the Start Slide Show group, click From Beginning.
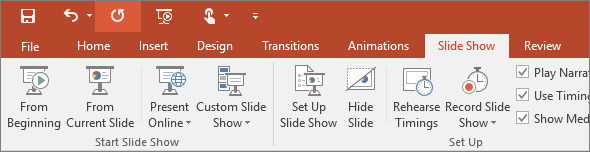
- If you’re not at the first slide and want to start from where you are, click From Current Slide.
- If you need to present to people who are not where you are, click Present Online to set up a presentation on the web, and then choose one of the following options:
Get out of Slide Show view
To get out of Slide Show view at any time, on the keyboard, press Esc.
Tips for creating an effective presentation
Consider the following tips to keep your audience interested.
Minimize the number of slides
To maintain a clear message and to keep your audience attentive and interested, keep the number of slides in your presentation to a minimum.
Choose an audience-friendly font size
The audience must be able to read your slides from a distance. Generally speaking, a font size smaller than 30 might be too difficult for the audience to see.
Keep your slide text simple
You want your audience to listen to you present your information, instead of reading the screen. Use bullets or short sentences, and try to keep each item to one line.
Some projectors crop slides at the edges, so that long sentences might be cropped.
Use visuals to help express your message
Pictures, charts, graphs, and SmartArt graphics provide visual cues for your audience to remember. Add meaningful art to complement the text and messaging on your slides.
As with text, however, avoid including too many visual aids on your slide.
Make labels for charts and graphs understandable
Use only enough text to make label elements in a chart or graph comprehensible.
Apply subtle, consistent slide backgrounds
Choose an appealing, consistent template or theme that is not too eye-catching. You don’t want the background or design to detract from your message.
However, you also want to provide a contrast between the background color and text color. The built-in themes in PowerPoint set the contrast between a light background with dark colored text or dark background with light colored text.
For more information about how to use themes, see Apply a theme to add color and style to your presentation.
Check the spelling and grammar
To earn and maintain the respect of your audience, always check the spelling and grammar in your presentation.